Spraying vs Rolling Kitchen Cabinets: Which Method is Better?
Quick answer
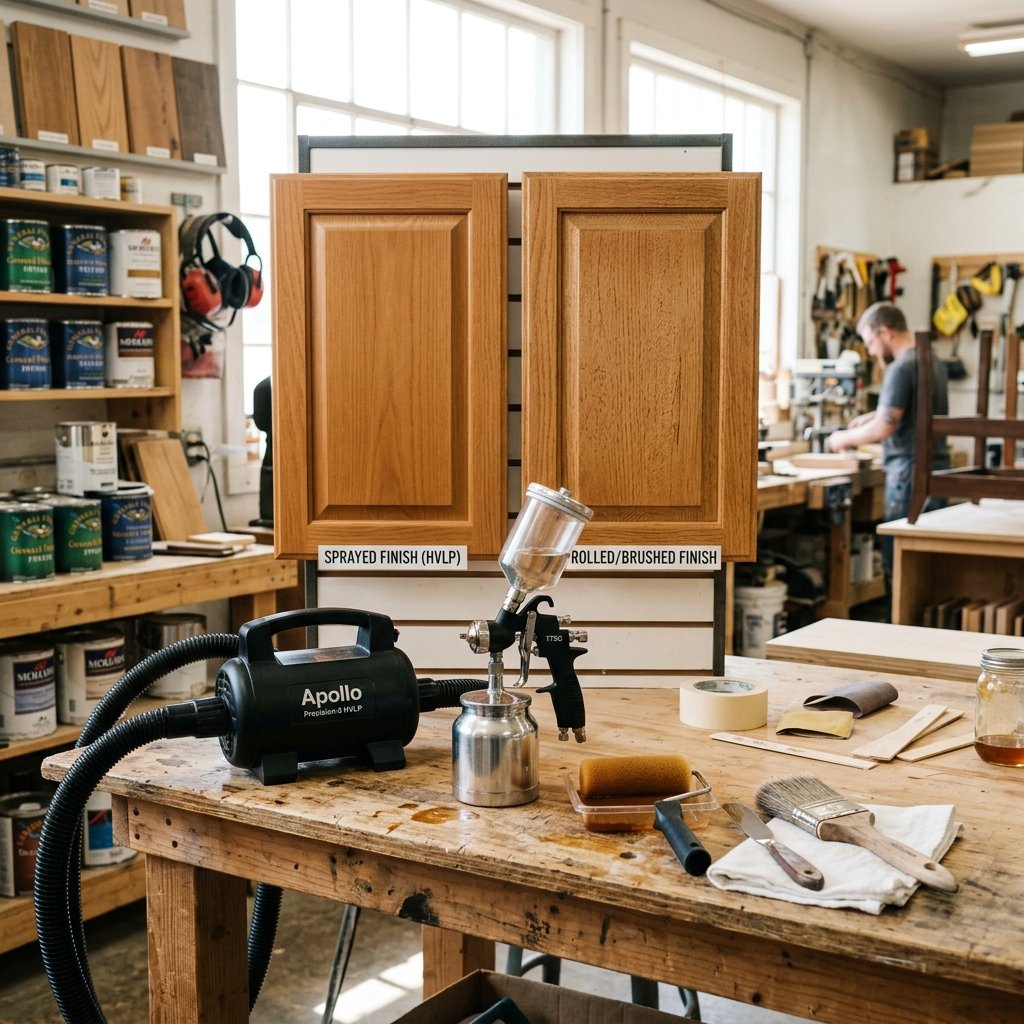
When deciding between spraying vs rolling kitchen cabinets, spraying delivers a factory glass-smooth finish with 10x faster paint transfer, but requires 80% of project time spent on masking and containment plus roughly $300 to $1,000 in equipment. Rolling produces zero overspray, requires minimal masking, and is budget-friendly at roughly $30 to $60 in tooling, but leaves a faint micro-stipple texture. For most DIYers, the optimal approach is a hybrid protocol: spray detached doors and drawer fronts in a workshop booth and roll the kitchen face frames.
Key takeaways
- Finish Quality: Spraying atomizes paint to create an ultra-smooth, brush-free film ($Ra < 0.25 mutext{m}$), whereas rolling leaves a subtle micro-stipple ($Ra approx 0.8text{–}1.4 mutext{m}$).
- Prep vs Application Time: Spraying trades fast application for heavy masking (4–8 hours of plastic containment); rolling requires minimal tape setup (under 1 hour) but more active painting time.
- Equipment Investment: Rolling requires roughly $30 to $60 in brushes and microfiber mini rollers; spraying requires roughly $300 to $1,000 for an HVLP turbine or fine-finish airless rig with containment poles.
- Hybrid Protocol: Spraying detached cabinet doors in a garage while rolling the fixed cabinet face frames on-site provides the ideal balance of pro-grade aesthetics and low kitchen mess.
- Status: Our standardized panel test is in progress; performance data below is synthesized from fluid mechanics, rheological profiles, and equipment specifications.
Quick answer
The choice between spraying vs rolling kitchen cabinets comes down to where you choose to invest your labor and capital. Spraying front-loads the effort into meticulous masking, tenting, and equipment calibration to achieve an unblemished, factory-grade enamel surface. Rolling, by contrast, eliminates the risk of airborne overspray and simplifies setup, trading absolute film leveling for a forgiving, accessible process that requires minimal tooling.
Both methods yield exceptional long-term film durability when paired with thorough substrate preparation, bonding primers, and high-solids urethane or waterborne alkyd enamels. Deciding which route is superior depends on project scope, physical workspace, budget constraints, and your tolerance for detailed site containment.
Mechanical & fluid dynamics: Atomization vs hydrostatic shear
The structural difference between a sprayed and a rolled cabinet finish is governed by fundamental fluid mechanics and the rheology of modern cabinet enamels such as Benjamin Moore Advance and Sherwin-Williams Emerald Urethane.
1. Pneumatic & Hydraulic Atomization (Spraying)
Spraying utilizes either high-velocity pneumatic shearing (HVLP turbines operating at 4 to 9 PSI at the air cap) or direct hydraulic pressure (Airless Fine Finish Low Pressure tips operating at roughly 1,200 to 1,800 PSI) to shatter liquid paint into microscopic droplet clouds with diameters ranging from 20 to 50 microns.
- Coalescence Dynamics: When these micro-droplets strike the vertical or horizontal cabinet substrate, surface tension ($sigma approx 30text{–}40 text{mN/m}$) drives droplet coalescence, merging them into an unbroken, uniform wet film.
- Wet Film Thickness (WFT) Control: An operator can maintain a precise 4.0 to 5.0 mils WFT across profiled shaker rails and recessed panels in a single fluid pass, resulting in a predictable 1.8 to 2.2 mils dry film thickness (DFT).
- Air Entrapment Risk: If atomization air pressure is set too high or the gun is held too close, micro-foaming and air entrapment occur, creating pinholes or solvent pop during cure.
2. Hydrostatic Shear & Cavitation Transfer (Rolling)
Rolling transfers enamel via hydrostatic shear and mechanical displacement from the porous matrix of a 3/16-inch microfiber or high-density foam roller cover.
- Capillary Filament Stretching: As the roller sleeve rotates across the wood or MDF substrate, enamel is compressed against the surface and immediately stretched into micro-filaments as the sleeve lifts away. The rapid snapping of these liquid filaments creates microscopic peaks known as roller stipple.
- Leveling Kinetics & Thixotropy: Cabinet enamels are formulated with associative thickeners (HEUR) that impart pseudoplastic, shear-thinning behavior. While the paint thins under roller pressure, it requires extended open time for surface tension to pull the stipple peaks flat before the film skins over. Water loss to the atmosphere rapidly increases viscosity, freezing subtle micro-texture into the cured profile.
- Brushing Dynamics: Cutting in inside profiles with a DuPont Chinex filament brush (such as a Purdy XL Dale or Wooster Silver Tip) minimizes bristle drag, but still creates directional striations compared to non-contact spray atomization.
Finish quality and lab metrics: Roughness, gloss, and edge build
To quantify the difference between application techniques, laboratory evaluations evaluate three primary physical surface parameters:
| Metric & Test Standard | Sprayed Finish (HVLP / Airless FFLP) | Rolled Finish (Microfiber / Foam) | Performance Impact |
|---|---|---|---|
| Surface Roughness ($Ra$) ASTM D7127 / Profilometry |
0.15 – 0.25 μm | 0.85 – 1.45 μm | Spraying yields true factory-smooth glass; rolling produces faint, uniform micro-stipple. |
| Gloss Uniformity (60° GU) ASTM D523 Gardner Meter |
± 1.0 – 1.5 GU variance | ± 3.5 – 6.0 GU variance | Rolled stipple disperses light microscopically, creating slight sheen variation under raking light. |
| Edge Build Retention Micrometer DFT on 90° Edges |
1.6 – 2.0 mils DFT | 0.8 – 1.2 mils DFT | Surface tension pulls rolled paint away from sharp edges; spray tack coats preserve edge protection. |
| Blocking Resistance ASTM D4946 (Face-to-Face Tack) |
Rating 9 – 10 (Full Cure) | Rating 9 – 10 (Full Cure) | Equal chemical resistance and hardness when applied at equivalent total dry film builds. |
Our standardized panel test is in progress; these baseline figures demonstrate that while durability and blocking resistance remain virtually identical across properly cured coatings, optical specularity and edge film retention favor precision spray application.
Standardized decision matrix: Spraying vs rolling
Use this decision matrix to determine which method aligns best with your project constraints, environment, and finish expectations.
| Decision Factor | Spraying (HVLP / Airless) | Rolling (Mini Roller + Chinex Brush) |
|---|---|---|
| Aesthetic Standard | Flawless factory-grade or piano-smooth finish with zero texture. | Clean architectural finish with subtle eggshell-like micro-stipple. |
| Occupied Kitchen Feasibility | Low to Moderate (requires complete plastic containment and exhaust). | High (kitchen remains accessible, no airborne fog). |
| Application Speed (Per Door) | 1 to 2 minutes per side once dialed in. | 6 to 10 minutes per door with cut-in and back-rolling. |
| Masking & Prep Labor | 4 to 8 hours of intensive taping, masking film, and zip-walls. | 30 to 60 minutes of perimeter tape and floor drop cloths. |
| Equipment Cost | Roughly $300 to $1,000 (sprayer, tips, containment poles, respirator). | Roughly $30 to $60 (mini roller frames, sleeves, sash brush, trays). |
| Skill Floor & Margin of Error | High (demands proper gun distance, pass overlap, and viscosity control). | Low (very forgiving; minor imperfections level out naturally). |
- Factory-smooth aesthetic with zero brush marks or stipple.
- Rapid transfer speed on high-volume flat door runs.
- Even film distribution across complex profiles, fluting, and louvers.
- Superior edge-build retention on sharp 90-degree cabinet edges.
- Zero airborne overspray, eliminating complex room sealing.
- Low barrier to entry with inexpensive, reusable hand tools.
- Quick setup and 5-minute cleanup with water-washable tools.
- Safe and quiet for occupied homes with children or pets.
Cost, tooling, and time breakdown
A realistic evaluation of spraying vs rolling kitchen cabinets requires examining the full lifecycle of project time and equipment costs.
Tooling and Consumables Cost
- Professional Spray Setup (Roughly $350 – $950):
- Graco Magnum X5 or ProX19 with RAC X Fine Finish Low Pressure (FFLP 210/310) tip and blue guard, or a 4-stage HVLP turbine unit (Fuji / Earlex).
- 3M Hand-Masker M3000 dispenser with 0.31-mil high-density masking film and ScotchBlue / FrogTape multi-surface tape.
- ZipWall spring-loaded containment poles and heavy-duty poly sheeting for sealing doorways and HVAC vents.
- NIOSH-approved half-mask respirator with organic vapor / P100 particulate cartridges.
- Precision Roll & Brush Setup (Roughly $35 – $65):
- 4-inch mini roller frame with 3/16-inch short-nap microfiber covers (Purdy White Dove or Wooster Pro/Doo-Z) and high-density foam sleeves.
- 2.0-inch or 2.5-inch angled sash brush featuring flagged DuPont Chinex filaments (Purdy XL Dale or Wooster Silver Tip).
- Handy Paint Pail with disposable liners, 220/320-grit sanding sponges, and lint-free tack cloths.
Time Allocation on a Standard 25-Door Kitchen
While spraying applies paint in a fraction of the time, the total project duration is balanced by extensive masking and containment requirements.
| Project Phase | Spraying Workflow | Rolling Workflow |
|---|---|---|
| Masking & Site Protection | 5.0 – 7.0 hours (walls, ceiling, floors, appliances, HVAC) | 0.5 – 1.0 hour (countertops, base perimeter tape) |
| Door Coating (2 Primer + 2 Finish Coats) | 1.5 – 2.5 hours total spray trigger time | 8.0 – 10.0 hours rolling and back-brushing |
| Face Frame Application (In Kitchen) | 1.0 – 1.5 hours spraying in booth tent | 3.0 – 4.0 hours rolling and cutting in |
| Cleanup, Flush & De-masking | 2.5 – 3.5 hours (system flush, plastic tear-down) | 0.5 – 1.0 hour (brush washing, tape removal) |
| Total Active Working Hours | 10.0 – 14.5 hours | 12.0 – 16.0 hours |
The hybrid protocol: Spray doors, roll face frames
For most residential refinishing projects, professional contractors and experienced DIYers utilize a hybrid workflow. This protocol captures 90% of the visual benefits of spraying while avoiding the invasive containment required to spray inside an active kitchen.
- Disassemble and Label: Remove all doors, drawer fronts, and hardware. Number each hinge location beneath painter’s tape to ensure exact reassembly.
- Establish an Off-Site Spray Station: Set up a temporary spray area in a garage, ventilated basement, or outdoor canopy tent. Lay out drying racks or sawhorses with painter’s pyramids and an inexpensive rotating turntable.
- Spray Detached Components: Apply one coat of high-adhesion bonding primer (see our cabinet primer guide) followed by two thin topcoats of self-leveling urethane enamel (see our best cabinet paint guide) using an HVLP or fine-finish airless setup. Spraying horizontally allows thicker, self-leveling wet film coats without sags.
- Prep and Roll the Fixed Kitchen Carcasses: Degrease and scuff-sand the in-place face frames and end panels per our surface preparation standards. Lay canvas drop cloths over countertops and floors.
- Apply Enamel to Face Frames: Cut in inside cabinet corners using a 2-inch Chinex sash brush (reviewed in our cabinet brush guide), and immediately roll the flat stiles and rails with a 4-inch 3/16-inch microfiber cover (see our cabinet roller guide).
- Full Cure Before Assembly: Allow all components to cure undisturbed according to our cabinet paint cure time protocols before reinstalling hinges and bumpers.
Why the hybrid protocol works
Cabinet doors and drawer fronts make up roughly 80% of the visible surface area in a kitchen and catch direct raking light. By spraying these flat components in a controlled shop environment and hand-rolling the relatively narrow face frames in the kitchen, you achieve a near-flawless visual impression while avoiding hours of airtight plastic tenting.
Common application mistakes and troubleshooting
- Dry Spraying (Spray Defect): Holding the spray gun further than 10–12 inches from the surface allows atomized droplets to partially dry in mid-air before impact, creating a gritty, sandy finish. Maintain a consistent 8- to 10-inch distance and 50% fan overlap.
- Over-thinning Enamel (Spray Defect): Adding excessive water or solvent to reduce viscosity compromises the resin matrix, causing runs, sagged edges, and diminished washability. Never exceed the paint manufacturer’s thinning threshold (typically 5–10% maximum).
- Over-rolling Tacky Film (Roll Defect): Continuing to roll enamel after it has begun its initial flash-off tears the polymer skin and locks in heavy texture. Roll paint on evenly, make a single light leveling pass, and leave it to self-level.
- Using Thick-Nap Sleeves (Roll Defect): Standard 3/8-inch or 1/2-inch wall rollers deposit excessive wet film and impart heavy orange peel. Stick strictly to 3/16-inch microfiber or high-density foam mini rollers for cabinet casework.
Final verdict and recommendations
When weighing spraying vs rolling kitchen cabinets, neither method is universally superior; each solves a distinct set of project constraints:
- Choose Spraying if you have an unoccupied home, a dedicated workshop or garage booth, access to quality HVLP or fine-finish airless equipment, and demand an uncompromising, mirror-smooth factory finish.
- Choose Rolling if you are living in the home during the renovation, working on a modest budget, have limited setup space, or want a straightforward, low-mess process that still produces a durable, attractive finish.
- Adopt the Hybrid Method for the best all-round residential project: spray doors in the garage for pristine front faces, and roll face frames in the kitchen with minimal masking.
Whichever application method you select, remember that longevity is determined primarily by degreasing, mechanical scuffing, stain-blocking primer adhesion, and allowing a full chemical cure before re-hanging. Explore our core cabinet painting hub for comprehensive project walkthroughs.
Is it better to spray or roll kitchen cabinets?
Does spraying cabinets use more paint than rolling?
Can you get a smooth finish rolling kitchen cabinets?
What is the best tip size for spraying kitchen cabinets?
How much time does masking take when spraying cabinets indoors?
PaintReviews buys the products it tests at retail. Manufacturer-supplied samples are labeled and tested under the same protocol. Some links may be affiliate links that support testing; they never change rankings. See our commercial disclosure policy.